
Self Building
How to Install Hardwood Floor
A step-by-step guide for installing wood floors in your home.
A successful wood floor installation is one of the most fulfilling do-it-yourself projects – giving you a highly rewarding sense of accomplishment.
Below is a step-by-step guide to install wood floors in your home.
Editor’s Note: Before we get started, let’s cover a few basics.
Safety considerations
It is important to prioritize safety when cutting wood for installation. Be sure to wear safety glasses, a safety mask, work gloves, and ear protection.
Additionally, for added safety, consider wearing steel-toed boots, especially when using a pneumatic nail gun during the installation process.
Tools
For a successful installation, you need tools like a tapping block, moisture meter, nail setter, claw hammer, table saw, jigsaw, mallet, chalk reel, ¾-inch spacers, long level, and a pneumatic nailer or flooring nailer (optional).
You also need measuring tools such as a tape measure, a pry bar, and a drill with bits.
Safety gear is crucial, so equip yourself with safety glasses, a safety mask, work gloves, earplugs, knee pads, and punches or nail setters. Also, include items like a chalk line and staple gun to facilitate the installation process.
Materials
Be sure to collect the necessary materials in advance.
You’ll need hardwood, vapor barrier paper, flooring and underlayment, nails, wood putty, and collated flooring nails.
Make sure you have these materials ready to ensure a smooth and efficient wood floor installation.
Wood floor installation
Here is a guideline for the installation of nail-in hardwood floors.
1. Pick wood, and estimate materials
Start by picking your desired hardwood. You will then need to measure the space you intend to install hardwood floors on.
Once measured, add 5% allowance for cutting or up to 10% if the hardwood is to be laid diagonally. Ensure to round up when placing your order for the hardwood.
2. Allow wood to acclimate
Hardwood flooring requires time to adapt to the climate of your home.
It is advisable to let the hardwood acclimate for five days before installation, maintaining conditions at 75 degrees with humidity levels between 30% and 55%.
This helps in minimizing the potential expansion or contraction of the hardwood.
3. Set the area for installation
Pull the baseboards, then inspect the subfloor for levelness and smoothness.
If there is no existing subfloor, you’ll need to add one. Identify the locations of floor joists and cover the floor with underlayment.
Consider using a 15- to 30-pound asphalt-saturated felt, silicone shield, or vapor barrier paper to safeguard floors and subfloors from spills and ground moisture.
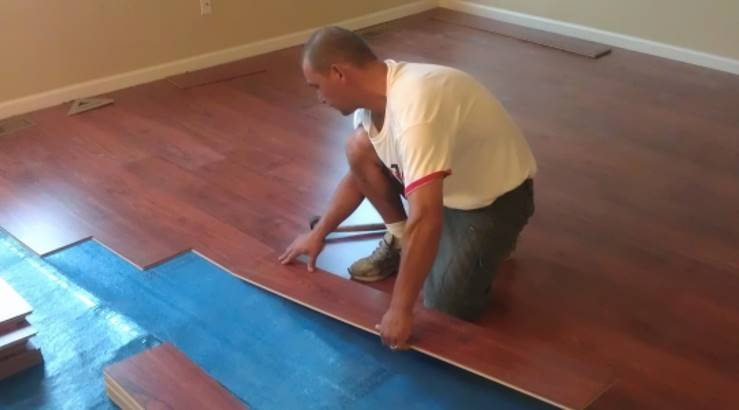
4. Install hardwood floor boards
Select the most even boards for the initial two rows. Nail the first rows through the face of the board, and other through the tongue using a pneumatic floor nailer.
If a pneumatic floor nailer is not available, drill a 1/32-inch diameter hole ½ inch from the grooved edge.
1. Create a chalk line and position the initial board along it, ensuring the groove faces the wall. Insert ¾-inch spacers along the length and between the wall and the board’s end to establish an expansion gap.
2. Drive nails into pre-drilled holes preferably using 6d or 8d flooring nails.
3. Using a mallet, gently position the next board and blind-nail it. Blind-nailing conceals nails by driving them at a 45-degree angle through the tongue, hiding them beneath the groove of the adjacent board in tongue-and-groove flooring.
RELATED: Popular Types of Floors for Modern Homes
4. Sink nails below the surface using a nail punch to prevent joint interference, then fill the hole with matching putty.
5. Trim the board to fit at the end, leaving a ¾-inch gap for expansion.
6. Nail at a 45-degree angle along the tongue edge at every floor joist throughout the row’s length.
7. Begin a new row by inserting the groove into the tongue of the first row and tapping it into place using a tapping block. Stagger the joists 6 inches apart and secure with nails at the end of the row.
8. Finish installing the remaining hardwood boards, varying sources, staggering joints, and allowing for expansion. Use a pneumatic floor nailer after the third row, tapping with a mallet. A jigsaw may be needed for precise cuts around objects.
9. Face-nail the final two rows on the tongue side. Drill 1/32-inch pilot holes ½-inch from the edge. Trim boards for the last row, leaving a ¾-inch gap for expansion. Use a pull bar for alignment and face-nail.
10. Trim excess underlayment, sand, and apply stain. Fill matching wood putty into nail holes.
5. Reinstall baseboards
Upon reinstalling the baseboards, they will conceal the expansion gap.
Ensure the lower edge of the baseboard aligns with the top of the floor and secure it to the wall with nails.
RELATED: Engineered Wood vs. Hardwood Flooring
Subsequently, attach shoe molding to the baseboard, avoiding nailing it to the floor or subfloor.
6. Install threshold or transition strips
Install threshold or transition strips where the floor edge is exposed for a seamless and aesthetically pleasing transition between different flooring surfaces.
By following the above steps, a DIY hardwood floor installation is achievable. However, for those lacking experience and aiming for a successful outcome without waste, hiring a professional is advised.


Stylish Mabati House Designs for Starter Homes
A quick overview of the most popular mabati house designs.


10 House Designs That Never Go Out of Style in Kenya
A quick overview of the most popular home designs in Kenya.


3 Bedroom House Plans for Dream Family Homes
These houses are ideal for families seeking a more spacious home.